Learn all the simple steps or methods to set up Chart of Accounts in QuickBooks
Interested in finding out the complete set of steps to be performed to setting up chart of accounts? Well, if yes, then keep scrolling. Talking about QuickBooks, it is one of the finest accounting software out there offering tremendous perks to small and medium-sized businesses. It does not help in managing the finances and accounting tasks but also streamlines the daily business operations. The software is loaded with tons of features, one of which is the Chart of accounts.
Well, The QuickBooks Chart of Accounts (COA) is a list of accounts that help in categorizing assets, owner’s’ equity amount, liabilities, as well as income. In short, it is a list of balances and accounts of the company. With the help of this feature, the user can understand how much money the firm has, how much it owns, and how much it owes. One can easily set up a chart of accounts in QuickBooks, by performing a certain set of steps, which we will be elaborating on later in this segment. To learn those steps, make sure to read this segment carefully. Or you can also connect with our QuickBooks Support team at ++1-844-719-2859 and they will help you with the process ahead.
Brief into the chart of accounts (COA)
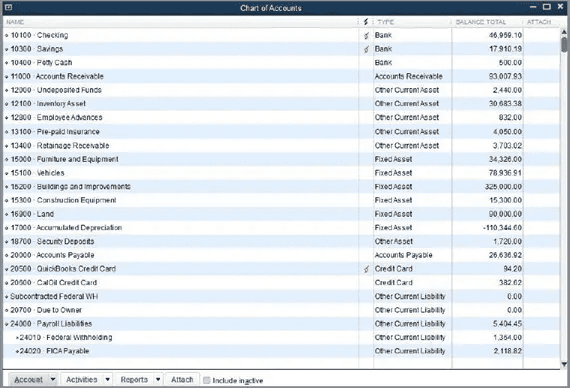
Before we dig in deep and learn the steps to set up a chart of accounts, it becomes essential to first understand what a chart of accounts actually is. Well, it is basically a list of account numbers and names that are related to the company. They can be categorige into four different labels, which include:
- Asset accounts
- Liability accounts
- Income accounts
- Expense accounts
These are the four basic categories that are include in accounting, and the line items distinguish the specific accounts. Each line item represents an account within each category. Certain charts of accounts might show up the equity accounts, which is a representation of anything that remains after accounting for all operating expenses and revenue accounts.
Different types of accounts in QuickBooks
As we mentioned earlier there are four different categories. Let us explore each of them one by one:
1. Asset Accounts
Let us first talk about the basic one, which is the asset account. This basically carries information such as the value of buildings, vehicles, land, inventory, valuables, etc. It further helps in tracking the amount paid for the property, and factors like depreciation. Items that are in liquid form like cheques, and other bank accounts are also included in this Chart of Accounts. It further includes the things like accounts receivables and notes receivables. It streamlines various accounts by organizing them into line items making it easy to track various components.
2. Liability Accounts
Talking liability accounts, they include information related to mortgages, payroll taxes, promissory notes, credit card balances, bank loans, personal loans, and income tax payables. When the user adds a loan to this account, he/she needs to ensure to add the sum of the loan also. The user will have to note the principal amount only. After you reach each monthly payment and enter the payment in the accounting system, you may have to split the payment into an amount subtract from what is own and an amount of interest paid, which will be add to the expense account.
3. Income Accounts
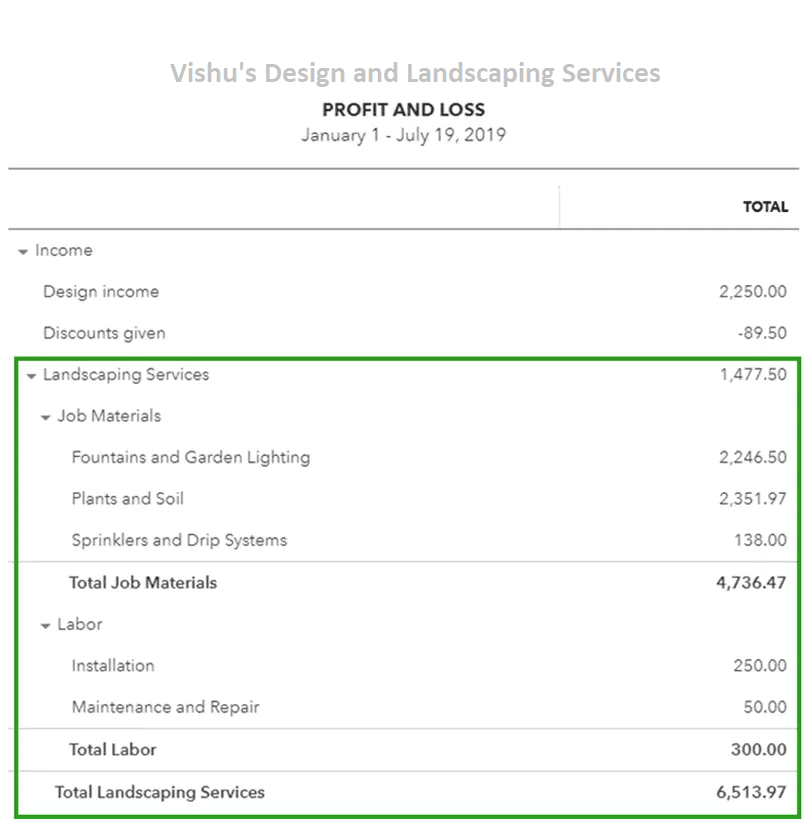
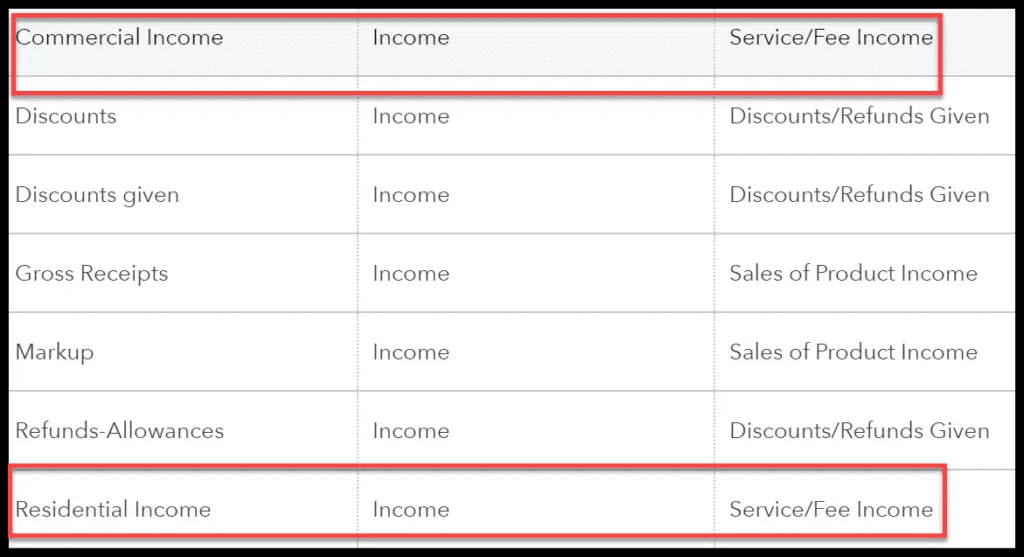
Now comes the income account that has revenues, additional incomes, and cost of sales. Some of the accounts are the same for all businesses, while some accounts are different for business types. It is suggested to make a separate line item in the chart of accounts for different types of income. Also keep a check on what various profitable activities may be and sort them by income type, instead of limping all the income into one account. After you identify the items generating major cash flow, then it is easy to manage things more properly.
4. Expense Accounts
Now comes the last account which includes the information related to the money spent. It helps in tracking the cash that isn’t with you. We recommend you break up the expenses into separate accounts and create sub-categories for your expenses.
Read also: How to Set up Multi-User Network in QuickBooks desktop?
Tips for organizing the chart of accounts
Before you begin with the steps to organize the chart of accounts, the following pointers or tips should be considered.
- Note that many accounting software preset with a chart of accounts. The lines of preset accounts include numbered headers like 1430.2 and 530.8. These numbers can be effective for large-scale companies but are usually a waste for entrepreneurs and small firms.
- Also, one should keep the line of items simple at first. Also, ensure that the line items have titles that make sense to the accountant. Using straightforward titles is what we recommend.
- Do not create a new line item for each of the transactions, this would mess up the entire chart of accounts. Rather, you should make use of the accounting software’s sub-headings.
You may see also: How to Use QuickBooks Auto Data Recovery?
How to access your chart of accounts?
One can try to perform the below set of steps to access the QuickBooks chart of accounts successfully. Let us have a look:
- On QuickBooks Desktop:
- Under QuickBooks desktop, select Chart of accounts from any of the QuickBooks menu
- And then head to the company and click on Lists or Accountant.

- On QuickBooks Online:
- Clicking on the Settings ⚙ icon is recommended
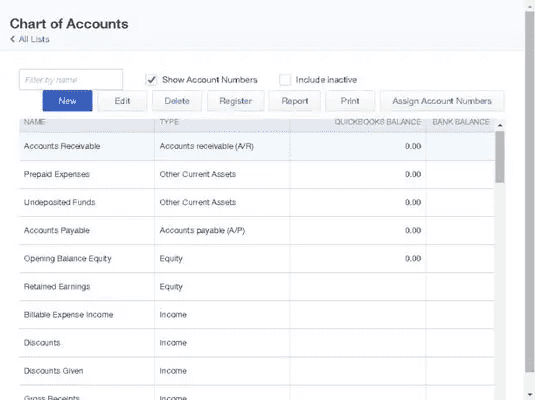
- After that select Chart of accounts.
Steps to Set up a Chart of Accounts in Software
The user can try to proceed with the below steps to set up chart of accounts in QuickBooks successfully. Let us have a look:
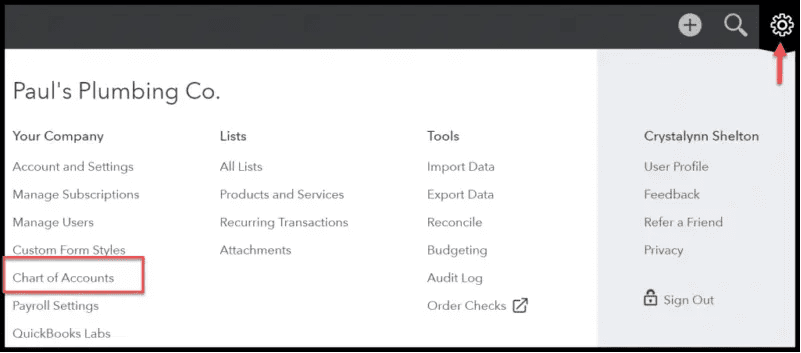
Step 1: Opt for the Lists – Charts of Accounts Command
- QuickBooks software will display the Charts of Accounts window on your computer screen
Visit also: Resolve QuickBooks Install Diagnostic Tool
Step 2: Go for the Account Button
- QuickBooks will show up the Account Menu on the screen,
Step 3: Adding New Account by opting for Account and then New
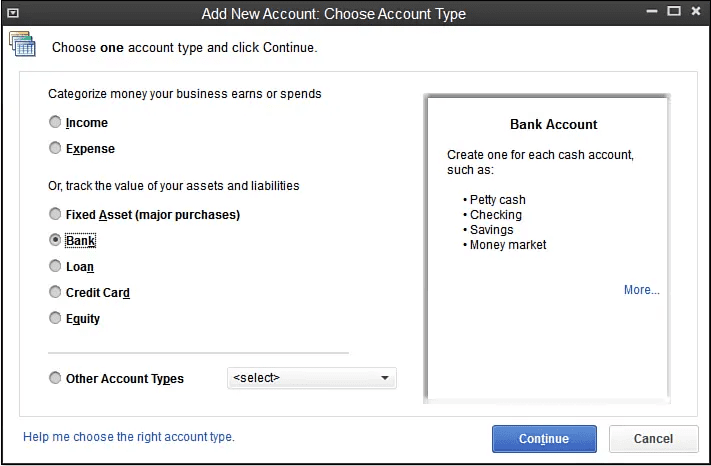
- QuickBooks will display the Add New Account window on the screen.

Step 4: Make use of the Account Type buttons
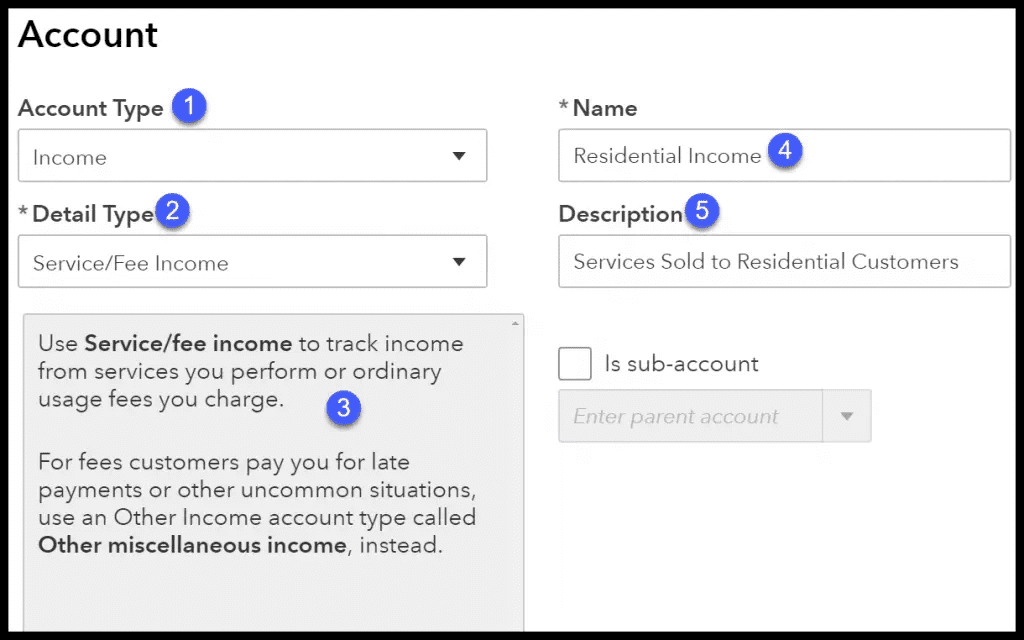
- The software offers different account types like Income, loan, Fixed Asset, Expenses, Credit Card, equity, Accounts Payable, Other Income, Costs of Good Sold, Accounts Receivable, Other Assets, Long Term Liability, Other Expenses, and more.
- Using the Accounts will help to learn about the location where your data is getting reported.
See here: What is QuickBooks Component Repair Tool and How to Use It?
Step 5: Click on Continue
- Now, hit continue, which will show the second Add Account window on your computer screen.
- It should be noted that the name of the account will show up in the financial statements.
Step 6: Check the Sub-account
- After opting for the sub-account of the check box, assign a name to the Parent account.
Step 7: Bank Account
- In case QuickBooks identifies that you work in different currencies then it will prompt you to look for all those customers, bank accounts, vendors, etc., using various currencies.
Step 8: Description of the New Account
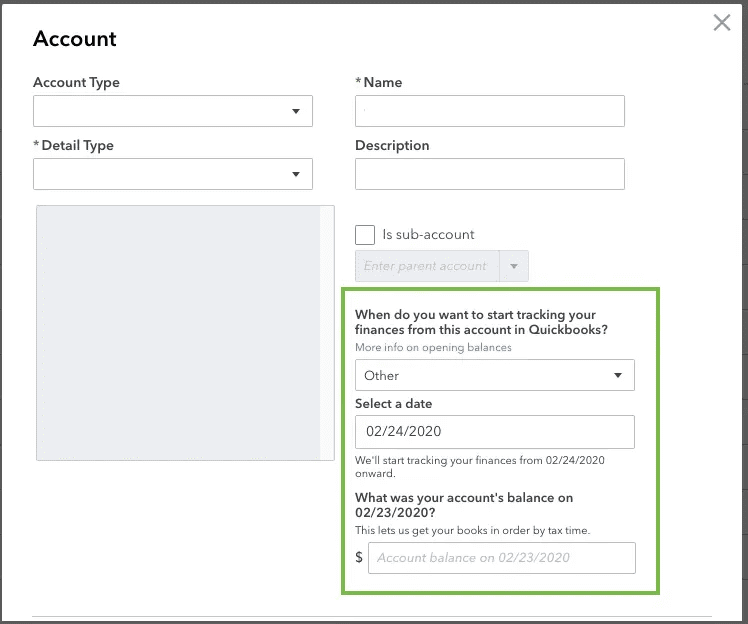
- Noe that QuickBooks uses only the account name in the financial statements, and so description isn’t required
Step 9: Get Account Info
- Under this step, the credit card account type version of the Add New Account window will appear to help in storing all the card details.
Step 10: Recognize the Tax Line
- Here, the user will see the cash account balances recorded on corporation’s Tax return. To add a bank account, one can use the Tax-Line Mapping drop-down list.
Step 11: Save the New Account
- Under this step, the user needs to click on next tab
- This will save the account information
- And also, it will display the Add New Account Window.
- After both accounts have been set up, the new accounts will appear on the chart of accounts list and you are done with the process
How to Modify an Account from the Chart of Accounts List?
The user can try to perform the below set of steps to modify an account from the chart of accounts list:
- The user needs to first select the account that is to be modified. And in QuickBooks, one can modify the accounts regardless of the time. Now, from the chart of accounts scroll down to the account that is to be modified and then click on the drop arrow, next to Run Report. After that hit the edit tab

- To modify the accounts, the user will be guided to the window, where he/she can make changes to the Account Name and Account Description fields. It is suggested to not change the category type, in case you have already entered transactions using the account. This can impact the financial statements
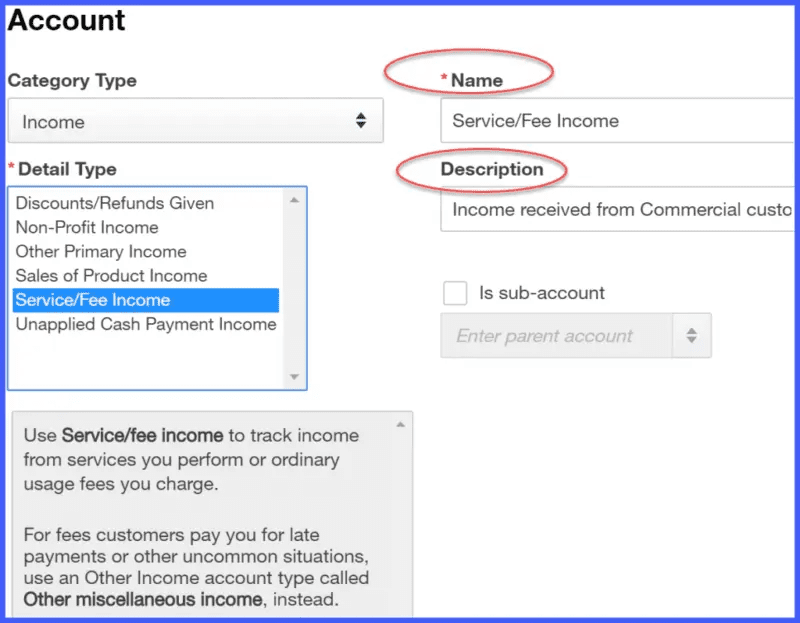
- Save and Close – Save the changes or else you will end up losing it.
To wrap it up!
Now that you are well-know in the set of steps that you need to perform to set up a chart of accounts in QuickBooks, we expect that you might be able to perform the procedure successfully. However, if you have any queries or if you need our assistance at any point in time, then feel free to connect with our 24*7 QuickBooks tech support professionals at ++1-844-719-2859 and let them help you with the process. We are a team of certified QuickBooks professionals who work round the clock in providing instant support services.
Other Related Post:
How to Fix QuickBooks Error Code 80029c4a?
Supported Versions QuickBooks Windows 10
How to Install, Download and Use QuickBooks Connection Diagnostic Tool?

