
Learn to make/record Journal Entry in QuickBooks Desktop
Creating journal entries might seem to be the most tedious task, but with QuickBooks, you simply need to follow a certain set of steps. Incorrect accounting entries are one of the common issues in accounting that can be address by simply creating a journal entry. Often to correct or adjust transactions and post entries, journal entries are use in QuickBooks. Creating journal entry in QuickBooks Desktop is a matter of a couple of steps. Note that you can only make a journal entry for one customer or vendor at one time. Just in case you want to correct multiple customer or vendor balances, then you might have to post separate entries.
If you are looking for methods to create a journal entry in QuickBooks Desktop, then reading this segment will help. However, if you are a non-technical person and want our assistance at any point in time, then connecting with our tech team at ++1-844-239-3583 is recommend. We are a team of certified QuickBooks Desktop Support professionals who work round the clock in providing immediate support services.
See also: How to Fix QuickBooks Unable to Backup Company File Error?
What is a journal entry in QuickBooks?
Before you head with the set of steps to create a journal entry, it becomes essential to learn the basics about journal entries. It is basically an accounting transaction entered, or posted, directly to the general ledger. It is essential for every business to keep a record of the transactions perform, which can be complete using journal entries. To learn the steps to create a journal entry in QuickBooks, scroll through the segment carefully.
Important points to consider
Before you head with creating journal entries, make sure to keep the following factors in mind:
- Note that QuickBooks online doesn’t support multi-currency in a single journal entry, which means that each and every currency has its own journal entry.
- Just in case you create an entry and want to fix the transaction, then do it by deleting and reversing the journal entry.
- Make sure to view the additional column for the location and class if you are making use of QuickBooks online plus.
- Make sure that the entry has a line for either A/R or A/P and also the vendor or customer name.
Essential rules for making journal entries
Below are the rules that you need to consider while creating a journal entry.
- Never create journal entries to inventory or payroll accounts.
- The entry to the accounts payable type or the accounts receivable will need a customer or vendor.
- Use the accounts receivable or accounts payable account on the second line of the journal entry.
- Include one account receivable or accounts payable type account in every entry.
You might also see: How to Fix QuickBooks Print and PDF Repair Tool?
When to use Journal Entry in QuickBooks online?
Making use of journal entries in QuickBooks Online is applicable in the following scenarios:
- Creating journal entries is recommended when sending money between income and expense accounts
- Also, at the time of transferring money from an asset, liability, or equity account to the income or expense account.
- Also, if you enter the debits and credits in the general journal or the ledger.
Steps to create journal entries in QuickBooks desktop
The user can perform the below steps to make journal entries successfully:
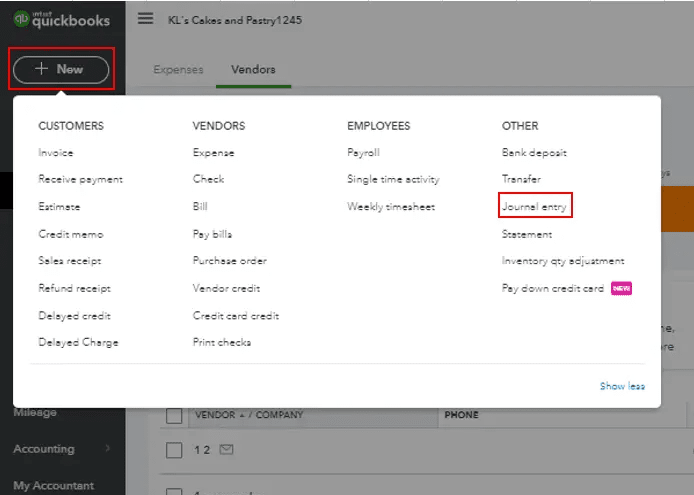
Step 1: Head to the Journal entry feature
- At first, head to the journal entry feature.
- After that click on the plus icon at the top right of the file.
- Followed by heading to the drop-down menu as Create, which has the Journal Entry option.
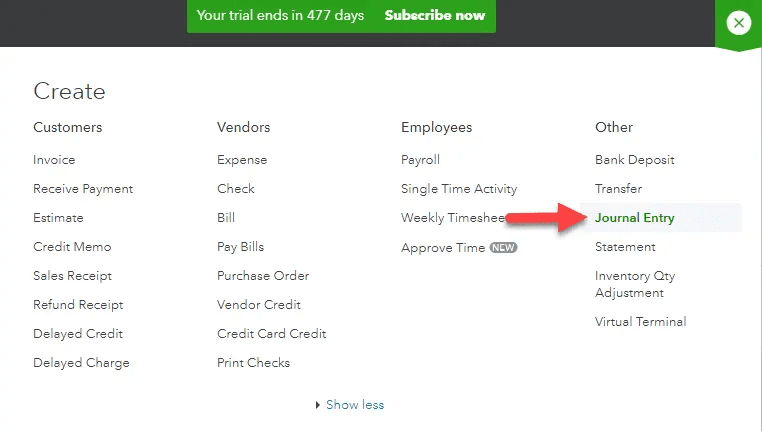
- This will redirect you to the window having the blanks for necessary information.
Step 2: Enter the date and journal number
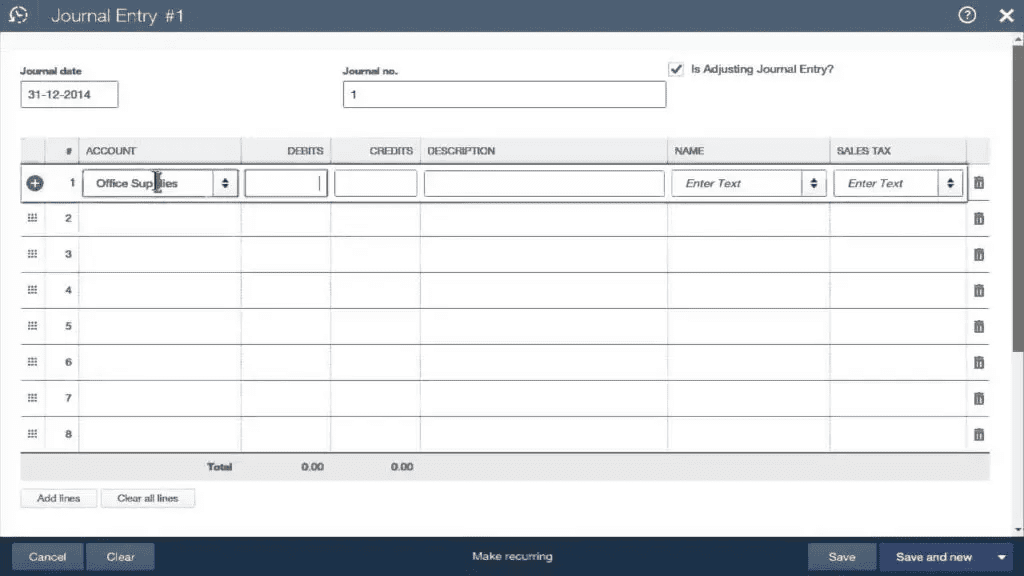
- Under this step, the user needs to edit the journal date after the form opens on the screen. The current date will be automatically entered by QuickBooks.
- Just in case you are recording any entry from any other date, then make sure to correct the date before moving ahead.
- Enter the journal number.
- Or the software will enter the sequential number on its own
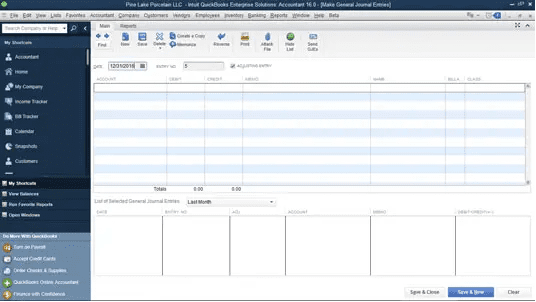
Step 3: Fill in the required information
- Accounts: This indicates the accounts in the chart of accounts.
- Journal code: The journal code is related to the entry and has to be entered to number the entries correctly.
- Debit and credits: Search for the transactions in the recent transaction report and note that the first in line are debits. After that check, if the debit has changed after the transaction is saved.
- Description: Type in a description to check the transaction details on the report.
- Name: Select the customer, employee, or vendor names.
Just in case the totals of both columns don’t match the sum of the credit column, then make sure to fill in the distribution line until the total of both tallies.
You may visit also: How to Resolve the QuickBooks Error 6129, 0?
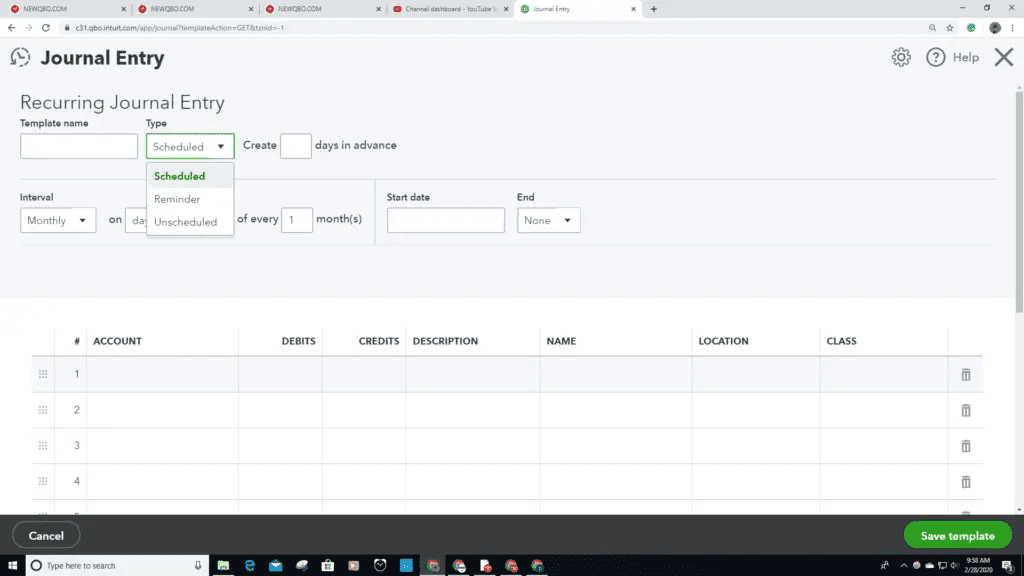
Step 4: Make recurring journal entry schedule
- Choose the recurring journal entry schedule and then save the transaction
Edit a journal entry
Simply creating the entries isn’t enough, you need to learn the steps to edit a journal entry as well.
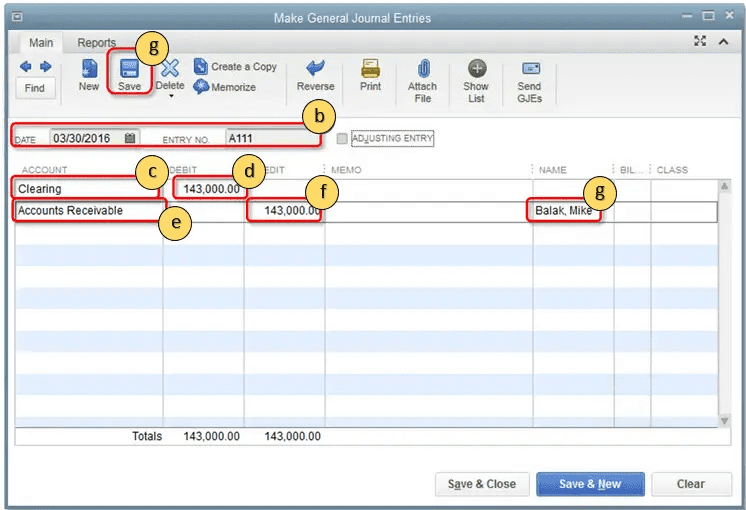
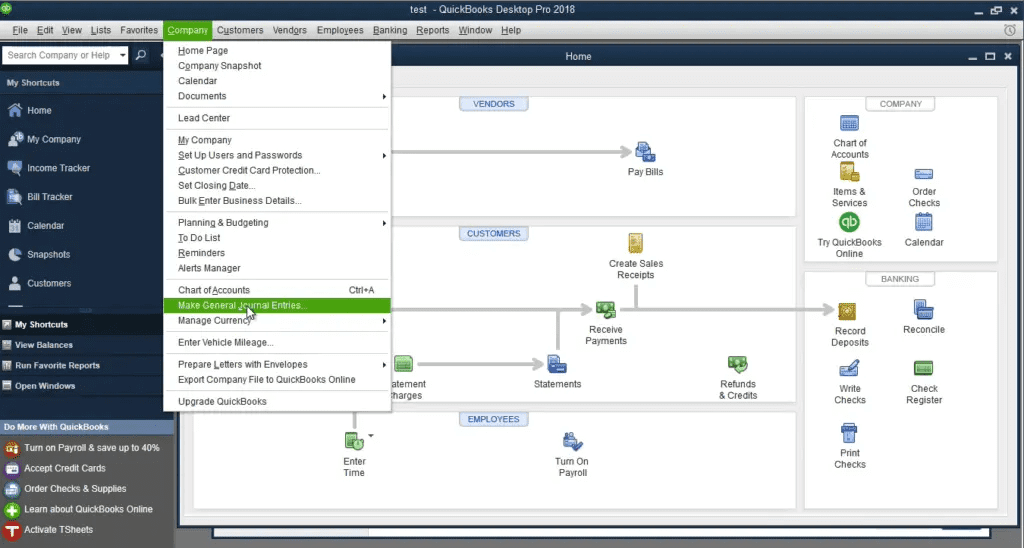
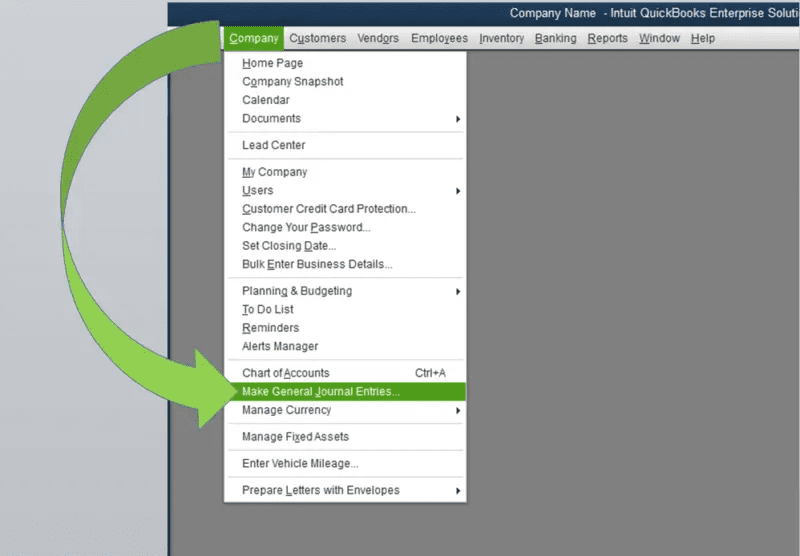
- The very first step is to head to the company menu and then opt for making general journal entries option.
- Once done with that select the find option
- Enter the name, date, entry no, or amount then click on find.
- After that double click the journal entry and then make the updates.
- Go for save and close.
- Hit the yes tab to record changes and you are done
Reverse a Journal Entry
The user can try to perform the below steps to reverse a journal entry. Let us have a look:
- The first step is to head to the company menu
- Go for the make general journal entries tab
- Search for and choose the journal entry that is to be reversed.
- Select find and then enter the name, date, entry no. or amount and then go for the find tab.
- If you are QuickBooks Mac user, then search for and select the journal entry that is to be reversed on the left side of the window
- The next step is to hit the reverse tab
- And choose the save or save & close tab.
It should be note that the reverse journal entry has an R next to the entry number and any debit and credit amounts that are reverse. Also, the new entry is date the first day of the next month, follow by the original transaction date.
You may also read: How to Open and Use a Secondary Company File in QuickBooks Desktop?
Conclusion!
We believe Creating journal entries in QuickBooks Desktop becomes easy once the set of steps is implemented. However, if you are unable to create one even after performing the set of steps above, then contact our QuickBooks Premier Support team personnel at ++1-844-239-3583 and we will provide you with instant support services. We are a team of certified QuickBooks professionals who work round the clock in providing immediate support services.
